Huawei E353 USB Modem Not Detected on Ubuntu - This time I'll share how to setup this USB modem. I'm facing this problem when I'm using Backbox linux. This guide also can solve for Ubuntu, cause Backbox is based Ubuntu 14.04.
For so long time I've Ubuntu (14.04, 15.04), it's always detected my Huawei E353 USB Modem automatically. So I write this simple trick for you who have same condition.
For so long time I've Ubuntu (14.04, 15.04), it's always detected my Huawei E353 USB Modem automatically. So I write this simple trick for you who have same condition.
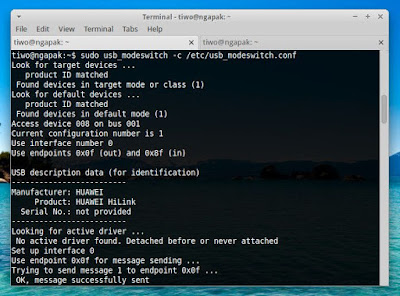
That's the screenshot of solved Huawei E353 doesn't detected automatically.
1. Main Problem
I plug it in, and after a seconds the status light turns green and blinks twice every 3 seconds, which according to the manual means that the stick is activated and waiting to connect to a network. At the same time, it doesn't show at network manager.
# dmesg | grep tty
[    0.000000] console [tty0] enabled
2. How to Setup Huawei E353
We will use usb_modeswitch to get this USB dongle modem work propery. So make sure you have usb_modeswitch installed on your ubuntu. Let's start!
See Huawei Modem located. Open terminal Alt+Ctrl+T then type lsusb to see Manufaturer ID and Model ID. For example, this what I've :
# lsusb
Bus 003 Device 002: ID 8087:8000 Intel Corp
Bus 003 Device 001: ID 1d6b:0002 Linux Foundation 2.0 root hub
Bus 002 Device 001: ID 1d6b:0003 Linux Foundation 3.0 root hub
Bus 001 Device 005: ID 0cf3:3004 Atheros Communications, Inc.
Bus 001 Device 003: ID 13d3:5727 IMC Networks
Bus 001 Device 002: ID 0bda:0129 Realtek Semiconductor Corp. RTS5129 Card Reader Controller
Bus 001 Device 011: ID 12d1:1f01 Huawei Technologies Co., Ltd.
Bus 001 Device 006: ID 046d:c05a Logitech, Inc. M90/M100 Optical Mouse
Bus 001 Device 001: ID 1d6b:0002 Linux Foundation 2.0 root hub
Perhaps, the output will be different. But please remember this two :
- 12d1 is Manufacturer ID for Vendor
- 1f01 is Model ID for Product
Now create new configuration file or you just add an little config at usb_modeswitch.conf located at /etc directory. From terminal, run this following command ( change nano with your favorite text editor ):
sudo nano /etc/usb_modeswitch.conf
Terminal will displays configuration of usb_modeswitch. Copy this code and put it to the last line :
# HUAWEI E353 (DNA)
DefaultVendor=0x12d1
DefaultProduct=0x1f01
TargetVendor=0x12d1
TargetProduct=0x1f01
MessageContent="55534243123456780000000000000a11062000000000000100000000000000"
Change this two :
- 0x12d1 : Change 12d1 with Manufacturer ID, output from lsub- 0x1f01 : Change 1f01 with Model ID, output from lsub
Once added, save it by pressing Ctrl+O, then exit Ctrl+X. Now test the result! Run this command :
# sudo usb_modeswitch -c /etc/usb_modeswitch.conf
Look for target devices ...
   product ID matched
 Found devices in target mode or class (1)
Look for default devices ...
   product ID matched
 Found devices in default mode (1)
Access device 010 on bus 001
Current configuration number is 1
Use interface number 0
Use endpoints 0x0f (out) and 0x8f (in)

USB description data (for identification)
-------------------------
Manufacturer: HUAWEI
     Product: HUAWEI HiLink
  Serial No.: not provided
-------------------------
Looking for active driver ...
 No active driver found. Detached before or never attached
Set up interface 0
Use endpoint 0x0f for message sending ...
Trying to send message 1 to endpoint 0x0f ...
 OK, message successfully sent
Reset response endpoint 0x8f
 Could not reset endpoint (probably harmless): -99
Reset message endpoint 0x0f
 Could not reset endpoint (probably harmless): -4
 Device is gone, skip any further commands
-> Run lsusb to note any changes. Bye!
See Network Manager at Linux panel, and viola you did it! Your Linux detected Huawei E353 USB Dongle Modem now work prefectly. Open your browser, open 192.168.1.1 then connect it form main page.
Updated! This tutorial also works for Elementary OS
So that's all I can write about How To Install and Configure Huawei E353 USB Modem on Ubuntu and fix modem not detected. Hope you've enjoyed reading this tutorial as much I’ve enjoyed writing it. Let us know about more useful mozilla firefox extension by comment below this post. Thanks for visiting us.


