Linuxslaves.com - Today I'm gonna show you how to use ProtonVPN on Ubuntu Linux. ProtonVPN is an interesting privacy-oriented VPN service based in Switzerland and it's made from the same developers of ProtonMail, a popular end-to-end encrypted email service.
The individual servers are owned and set up by ProtonVPN, and connected to the internet using the company's own network.
The individual servers are owned and set up by ProtonVPN, and connected to the internet using the company's own network.
Get the ProtonVPN Config
First of all, you need to sign up a free ProtonMail Email account. If you already have one, simply go to https://account.protonvpn.com/login and log into your ProtonVPN dashboard.
These all you need to do to get the configurations :
- Click the Download menu from the left navigation bar
- Set Platform to Linux and Protocol to TCP
- Select Server configs
- Scroll down and click Download All Configurations button
- Extract the downloaded config (.zip) with archive manager
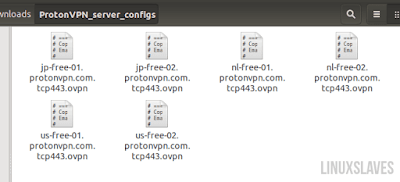
These are ProtonVPN config files you can use for free :
Find the ProtonVPN Credentials
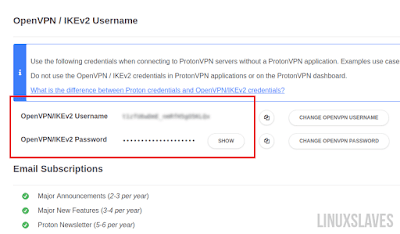
Click on Account tab and you'll see your two type of credentials to connect to the protected VPN network. The credentials ProtonVPN Login are used in Proton applications, and the OpenVPN / IKEv2 Username is used on manual connections.
If needed, you can also change it to make it easier to remember.
Setting Up ProtonVPN on Ubuntu
Open a terminal window via app launcher or simply pressing the Ctrl+Alt+T at the same time and navigate to the folder where you unzipped the configs.
Suggested read :
Alternatively, you can use file manager and right click on the empty space > Open in Terminal. Now run the following to initialize a new connection :
sudo openvpn --config config-file-name.ovpn
Enter the OpenVPN / IKEv2 username and password.
If you see "Initialization Sequence Completed" then you have finished the Linux VPN. Do not close the terminal to stay connected to the ProtonVPN.
ProtonVPN Client Tool for Linux
Thanks to ProtonVPN team for creating protonvpn-cli, a Linux VPN client tool. Ok, here are all you'll have to do in order to use the VPN client tool :
Open terminal via app launcher (Ctrl+Alt+T) then install these package (some of these may be already installed) :
sudo apt-get install openvpn dialog python wget
Type your password (no visual feedback) and press Enter and Y to continue.
Download the script from GitHub using wget :
sudo wget -O protonvpn-cli.sh https://raw.githubusercontent.com/ProtonVPN/protonvpn-cli/master/protonvpn-cli.sh
Make the downloaded script as executable :
sudo chmod +x protonvpn-cli.sh
Install the Linux VPN client by running the command below :
sudo ./protonvpn-cli.sh --install
Now the client is installed and ready to use.
Connect to the VPN Network
Run the following command to initialize the ProtonVPN Linux client :
sudo protonvpn-cli -init
or
sudo pvpn -init
Enter your username & password and select the subscription plan that you have for ProtonVPN. There are :
- Free
- Basic
- Plus
- Visionary
Start connecting to the servers by running :
sudo protonvpn-cli -connect
A detailed country list with all of the available ProtonVPN servers for you should appear.
So simply select your preferred one, OK to continue, choose between UDP or TCP protocol to use, and press OK.
That's it folks!. Enjoy browsing anonymously and unblock websites for free. Check out my videos on my YouTube channel for more content. Thanks for reading, see ya.


