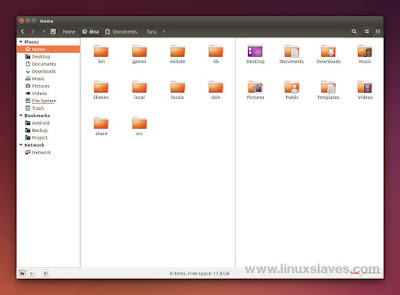
Linuxslaves.com - Today I'm gonna show you how to install latest version of Nemo file browser on Ubuntu 18.04 LTS Bionic Beaver and its derivatives system like Pop! OS via PPA that fix rename box issue and set Nemo as default file manager.
Nemo is a free and open-source software forked of Gnome Files (formerly named Nautilus). It's an official file manager of the Cinnamon desktop environment that used by Linux Mint.
Nemo is a free and open-source software forked of Gnome Files (formerly named Nautilus). It's an official file manager of the Cinnamon desktop environment that used by Linux Mint.
Back to 2012, Mint developers chose to fork Nautilus because of the controversial design changes in v3.6. Clement Lefebvre calling it "a catastrophe".
Why Nemo is Better Than Nautilus?
As most of you may already know, Nemo has better features compared Nautilus in terms of features. Traditional local drives in sidebar instead of nonsense "Other location" is one of many features that I love the most.
Suggested read :
I hate to perform extra click just to see my data. "Hey, you can bookmark it", Yes, but you have to mount it, otherwise the path is not found. That's why bookmarking partitions feels wrong to me.
As you can see in the screenshots above (click to enlarge), you will get useful features, including :
- Type ahead to navigate
- Dual pane / split view
- Lovely compact view
- Sidebar tree view
- Displays available disk space in statusbar
- Menubar / global menu / LIM
- Configurable toolbar
- Configurable context menu
- Open With specific app dialog
- Dedicated copy and move dialog
- In-place file rename instead of popup
- Open multi properties windows
- And many more
Nemo's desktop handling is also more customize-able. It let you desktop icons horizontally or vertically and changing the icon size and arranging.
Installing Nemo in Ubuntu 18.04 LTS
Nemo is available on Ubuntu repository. You can install it by running sudo apt install nemo. But... it's v3.6.5 which is an old version. To get the newer one, we can use PPA or compiling the source code as shown in this video :
Personal Package Archive is perfect choice for those who don't want to struggling with the dependencies. That means the installation is much easier.
As usual, open Terminal then run the following commands :
sudo add-apt-repository ppa:trebelnik-stefina/cinnamon
sudo apt install nemo
Once installed, you can now open it via Albert spotlight, Synapse launcher, Ubuntu dash, application menu, or simply type nemo in the Terminal window.
Make Nemo As Default File Manager
Well, this is optional. But if you want to replace Nautilus with Nemo as the default file manager for opening folders on any Ubuntu 18.04 LTS, 18.10, 19.04, 19.10, 20.04 LTS, all you have to do is run :
xdg-mime default nemo.desktop inode/directory application/x-gnome-saved-search
It will open Nemo when clicking the Open Containing Folder in any downloaded files on Mozilla Firefox, Google Chrome, and other web browsers.
That's were all to install latest Nemo in Ubuntu 18.04 LTS via PPA. Feel free to share if you find this guide is helpful. Thanks for reading, see you in the next Linux stuff, and stay safe everyone!.


